360 Chicago Panorama Campaign
Earlier this spring, my friends at 360 CHICAGO and Point B Communications reached out to me about creating a custom panorama of the observatory’s North and South views for their summer advertising campaign. Of course, I was interested. Little did I know it would be one of my biggest (literally) shoots to date. Here is a behind-the-scenes account of the production process, from concept to completion.
The main challenge of this project was that the files needed to be big. Huge really – much bigger than any existing image I had in my archives. The goal was to create panoramic images approaching 37,000 pixels wide (for reference, the full-frame sensor on my D800 outputs images at 7,360 pixels wide). Why so big? The images would be be wrapped around double decker busses (among other smaller applications) and they wanted the highest quality image with minimal pixelation. Challenging? Yes. Doable? Totally. So we set-up a meeting to discuss details logistics.
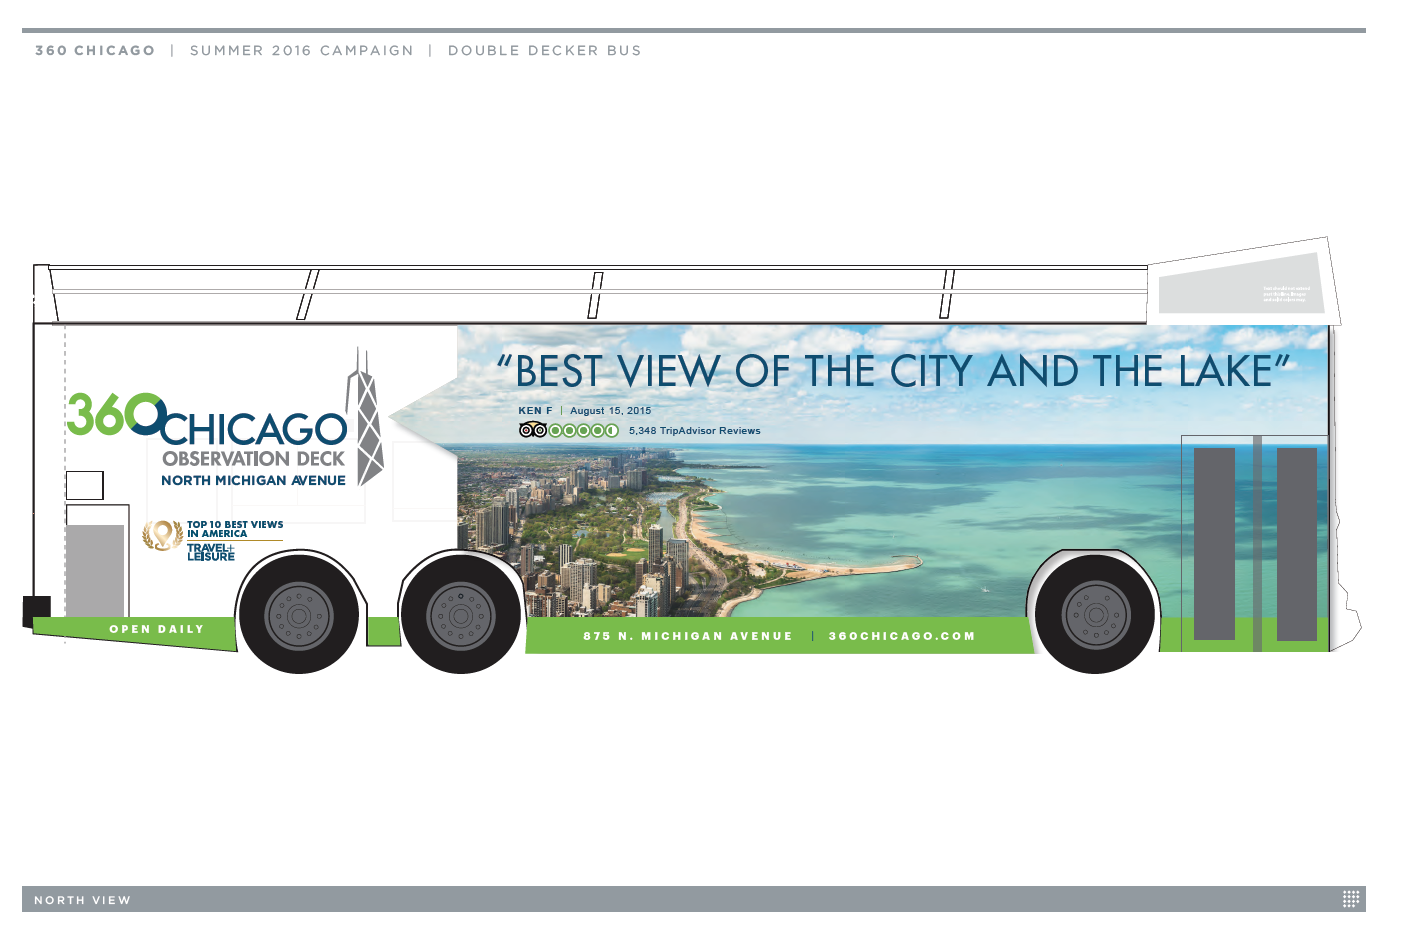
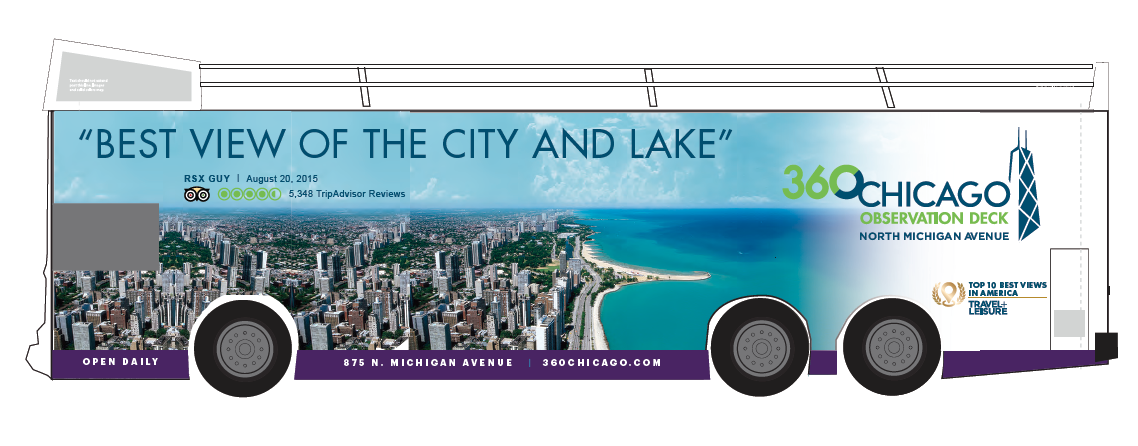
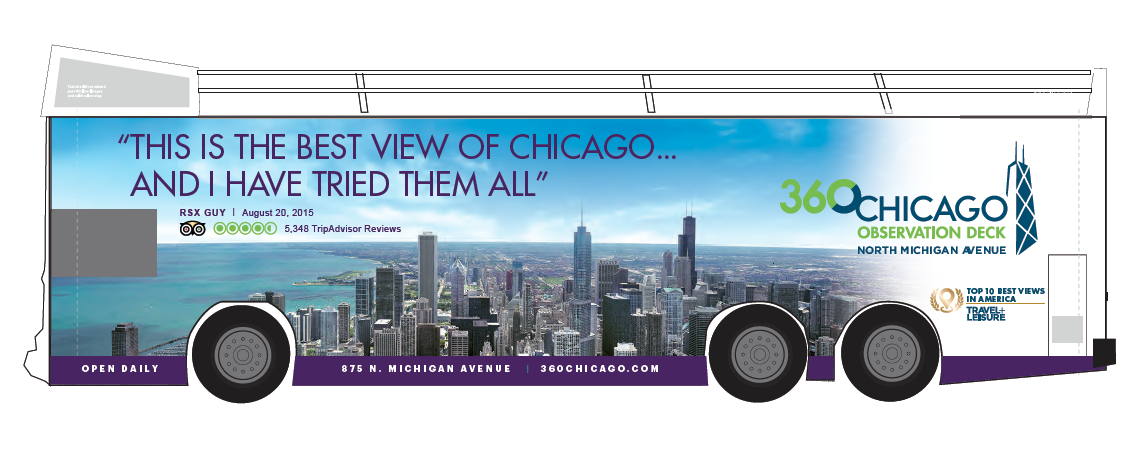
The deliverable list was pretty simple: One sunset/blue hour panorama of the skyline view to the South; one daytime panorama of the lake views to the North; and a couple images of people interacting with TILT (those were non-panoramic). Here are a couple of the initial concept mock-ups for the double decker busses (Big thanks to Point B for sharing these):
 The other challenge was the deadline. Our first meeting was on May 2nd. The final images needed to be delivered by May 27th at the latest. Normally, a small batch of photos is easy to deliver in three weeks, but when ideal weather conditions are needed to create the perfect images, taking advantage of the right light is critical – assuming you get it. And Chicago’s late spring weather is notoriously erratic, to say the least. I knew I’d be spending a lot of time at the observatory over the coming weeks…
Test One (5/2/16)
Immediately after the meeting wrapped, I stayed on the observatory floor to begin test shooting. I first had to do a little math to figure out how many frames I would need to stitch together in order to reach the 37,000 pixel width. Accounting for ~20% image overlap for an accurate photo stitch, I determined I’d need a minimum of seven frames across to reach the desired pixel width. Knowing that, I began photographing the skyline to determine the correct focal length needed to encompass the desired field of view in a minimum of eight frames.
In the end, I shot my first successful test at nine frames (50,592 pixels) wide at 125mm. In the images below, you can see the individual frames and the resulting panoramic output. I knew I’d need a third row above the skyline, but for testing purposes, this batch gave me enough information to move forward with the project.
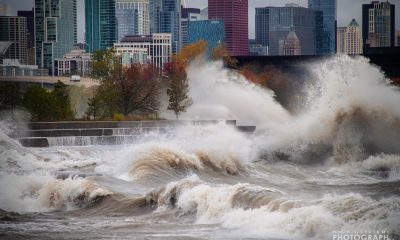
Test Two (5/13/16)
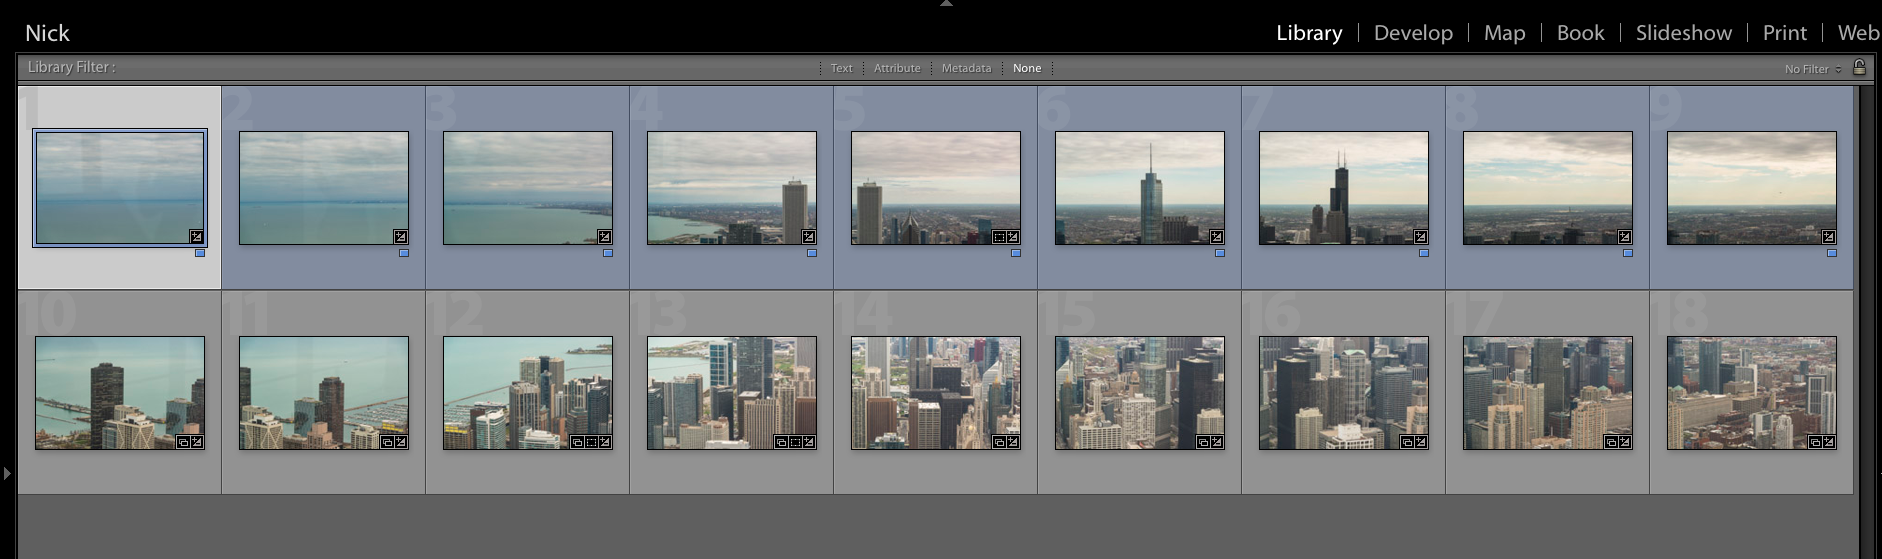
Almost two weeks went by without a decent shoot window, but on May 11 the weather finally looked favorable to capture the daytime North view. As a self-proclaimed weather geek, I waned to capture the perfect ‘summer’ day. It was always my hope that the sky would be littered with some puffy white cumulus clouds backed by a beautiful blue sky. For a while, the weather was great. But by the time I was geared up and and atop the observatory, the clouds had thickened enough to create a slight overcast. Instead of heading home, I took the opportunity for a more serious test. I set-up my tripod and measured out the degrees I’d need to pan/tilt each frame in order to reach the minimum seven frame width by three frame height.
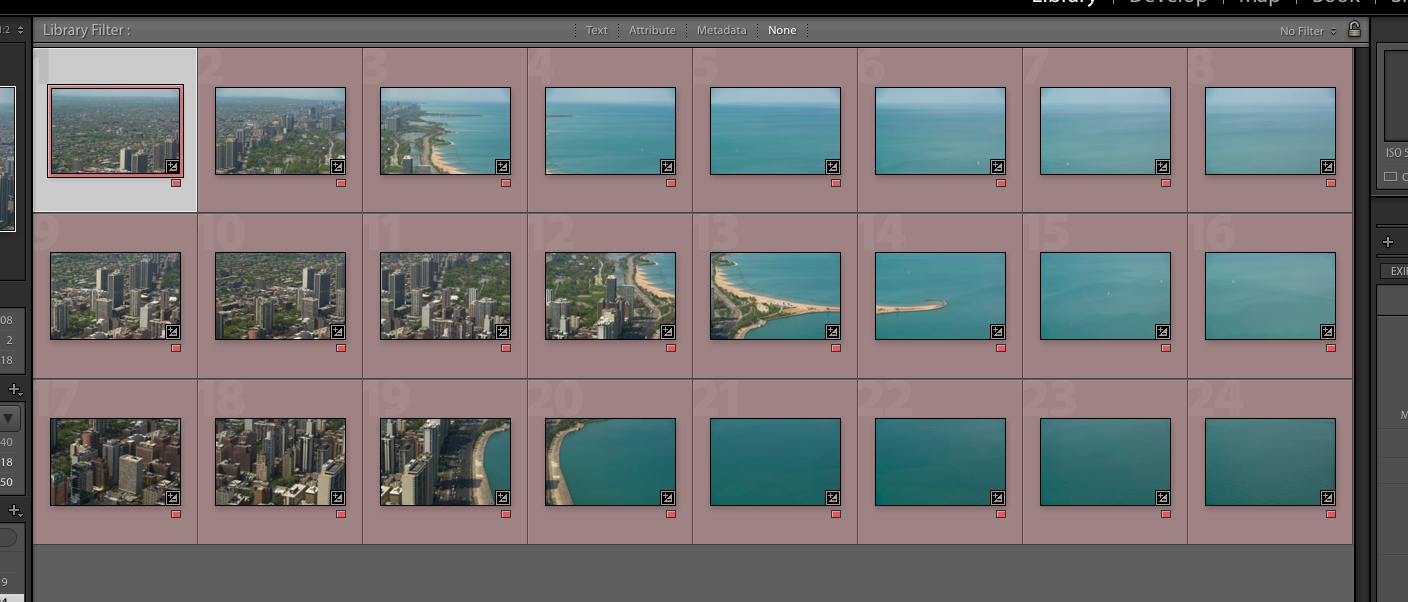
Because the sky was pretty flat and overcast, I focused more on the city for this test. Here again, you an see the batch of 24 individual frames I took in order to create a test panorama. Unfortunately, the Photoshop stitch didn’t work so well. There weren’t enough unique markers in the lake for the software to automatically arrange and blend the frames. I was still able to determine the correct focal length for the desired field of view, so I had that going for me, but I was a little concerned…
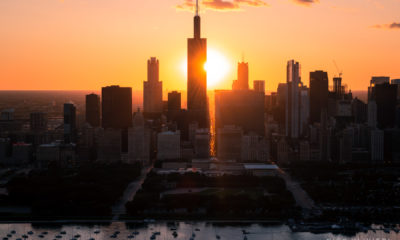
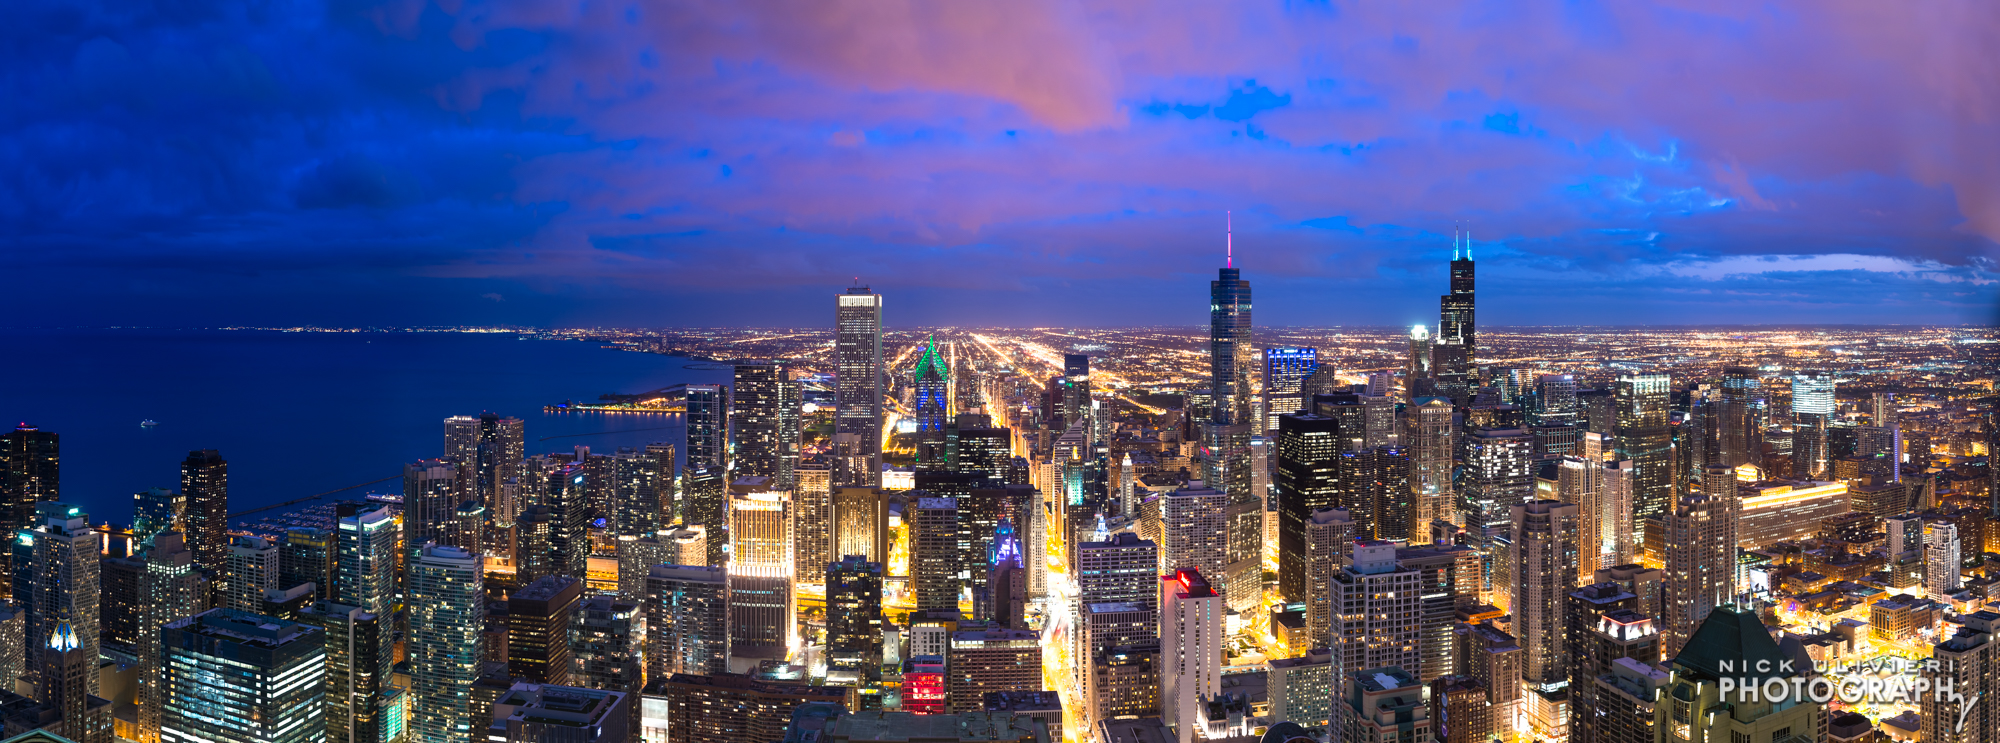
South View Shoot (5/14/16)
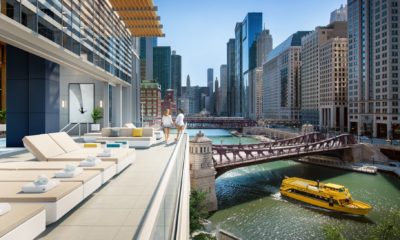
By mid-afternoon the very next day the sky looked like it might give me a photogenic sunset. So once again, I called the management team to let them know I’d be back to shoot – And I have to say – the 360 CHICAGO crew did a great job accommodating me and my requests. Each time I visited, they had a nice clean window roped off for me so I could capture the desired frames.
However, the clouds thickened up, AGAIN, and the sky took on a more overcast appearance. There was a nice orange glow on some of the taller buildings, but the cloud altitude, thickness, and type wasn’t the right mix for the vivid sunset I was after.
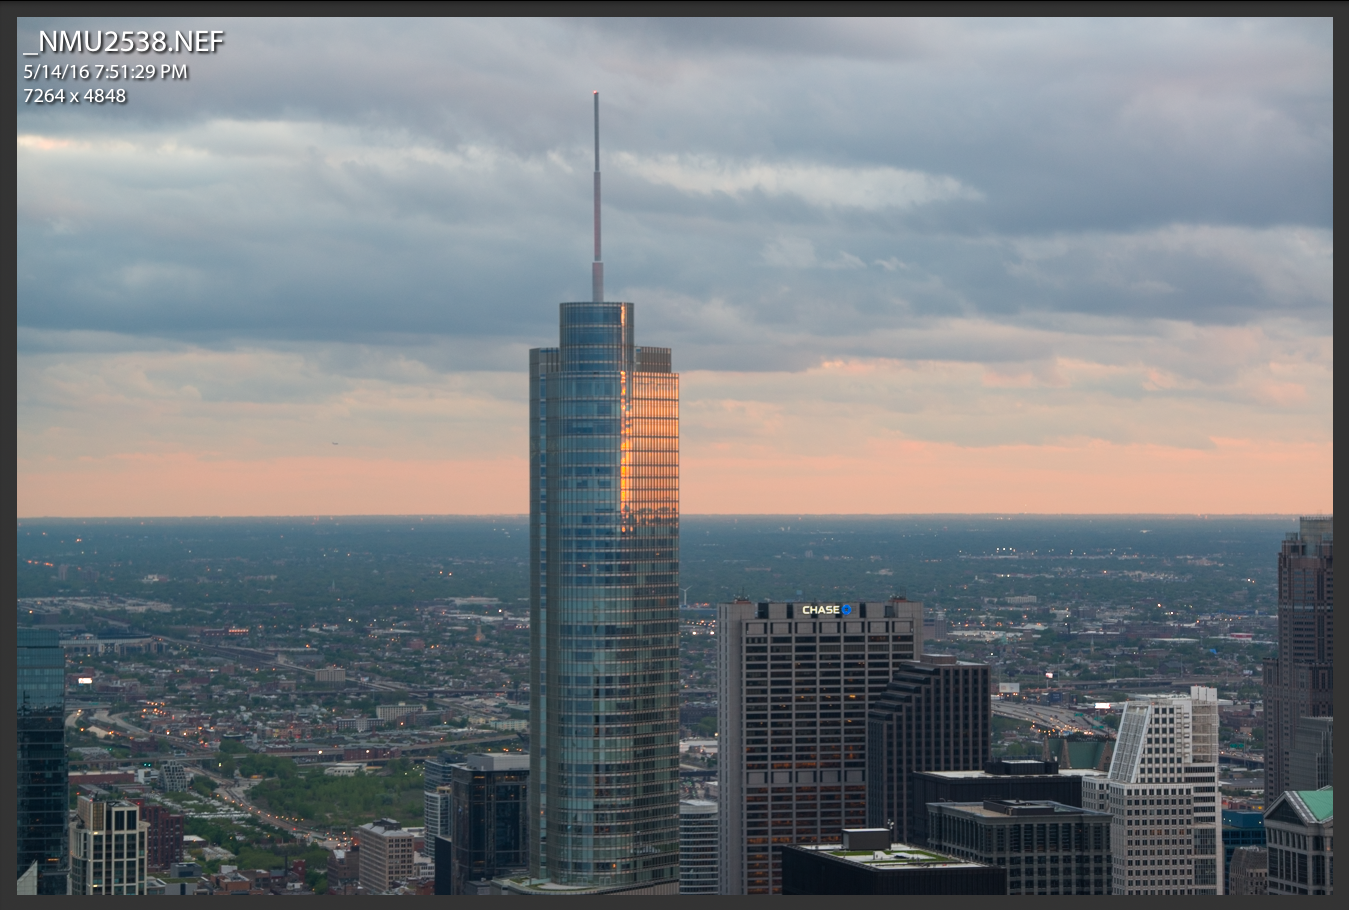
But I stuck around, and 20 minutes after the sun had set and the city lights began to shine, the sky started to take on a beautiful purple and blue glow. If I couldn’t catch a great sunset, a great blue hour was equally beautiful, if not more so, in my eyes. So I continued taking frames.
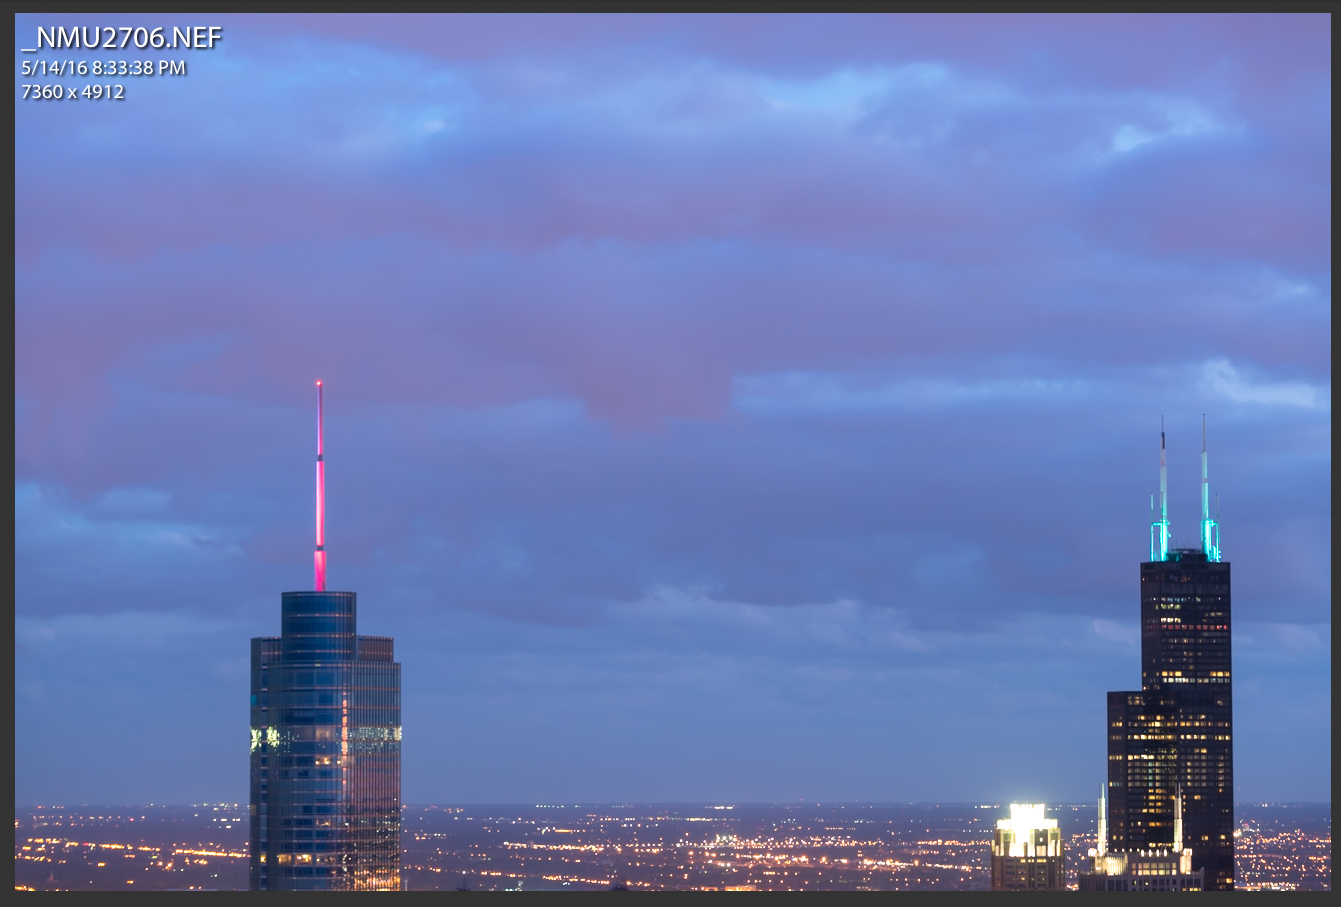
This was the most challenging of the two views to shoot. As it got darker, I needed a slower shutter for the correct exposure. Due to a combination of the longer exposure; precisely panning/tilting the tripod between each frame; ensuring proper focus; and adjusting the glare/reflection blocker for each frame; each panoramic batch of 22+ frames took roughly 4-5 minutes to complete. Since the light quality was quickly changing, I could only complete about three full batches during the prime light.
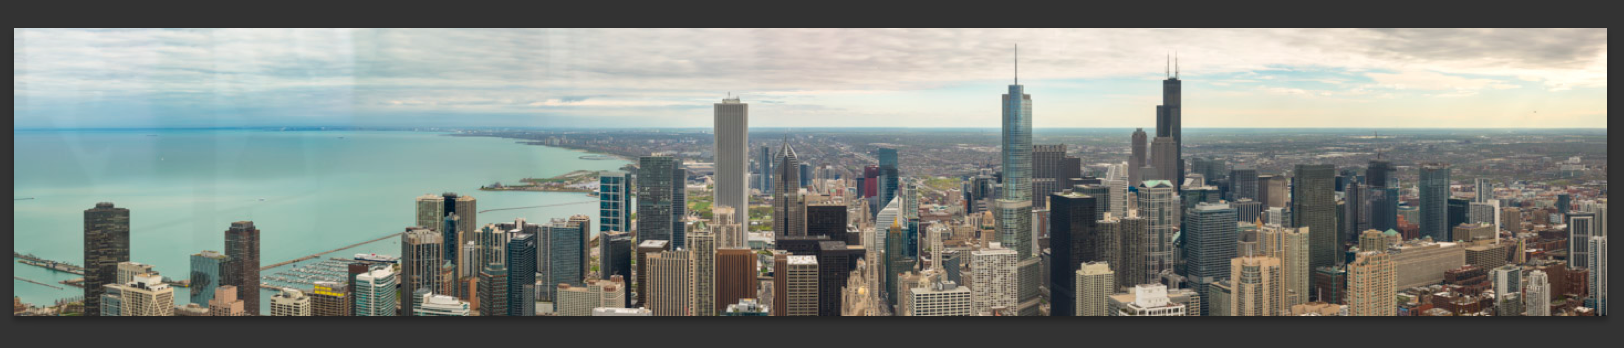
Luckily my favorite batch of frames stitched together fairly easily. The full panorama below is composed of 22 frames shot at 95mm. The final file is 37,674 pixels wide.
North View Shoot (5/15/16)
To say that shooting, organizing, editing, stitching, and post-processing the above panorama was time consuming is an understatement. Stitching the 22 final files together took nearly an hour of rendering time alone. So when I woke up to a beautiful day after a late-night edit session, I was torn. On one hand, I wanted to finalize the South View panorama before moving on, but on the other hand, I couldn’t pass up such picture perfect weather with the deadline quickly approaching. So I made the decision to visit the observatory for a third day in a row.
Upon arrival around 2:55pm, the clouds still looked great, and the shadows they cast on the lake were exactly what I wanted. I had my tripod, camera, and glare blocker set-up and I began, methodically taking frames. Because it was bright out, my shutter speed was quite fast and I was able to knock out the batches quicker than the night before. However beautiful, the clouds were a blessing and a curse. While they looked great in the sky, the shadows they cast on the earth quickly moved and morphed across the landscape. The way in which I was panning and tilting my camera across the scene meant that shadows would move, sometimes considerably, from frame to frame. In some cases, whole sections of Lincoln Park would be in shadow, and when I’d pan back for the overlapping frame it would be in full sun.
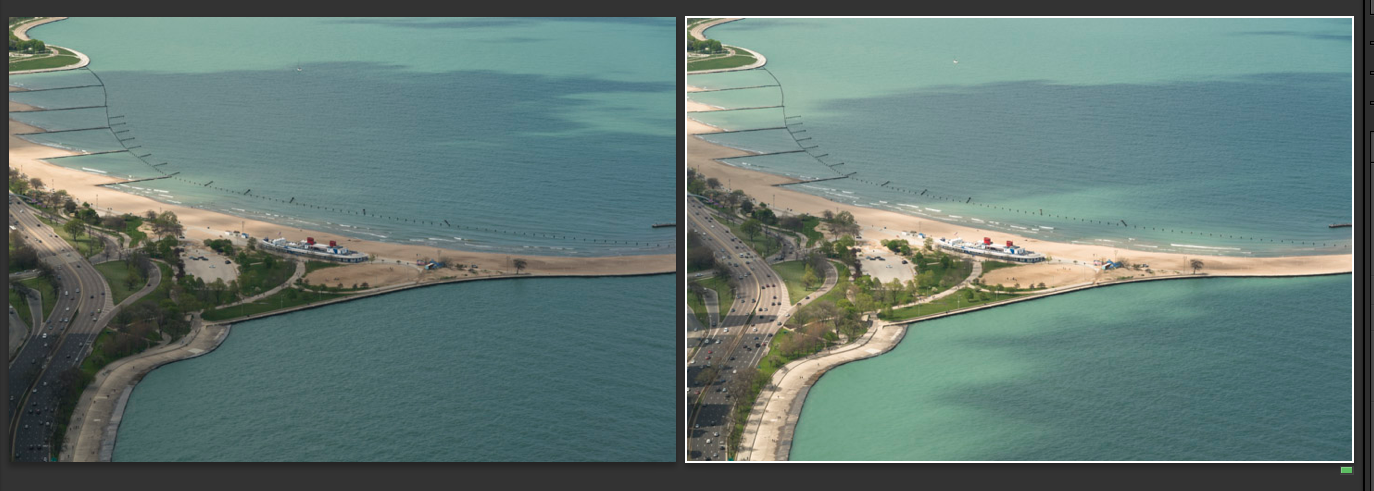
I had to switch tactics. After capturing the 24 frames for each batch in typical fashion (Pan left-to-right, tilt down a few degrees, pan back right-to-left, tilt down a few degrees, pan back left-to-right), I would re-position my tripod to focus on key areas to ensure I had the preferred sun/cloud mix. I did this in case I had to manually blend them into the panoramic composite. Here’s an example showing how drastically North Avenue Beach could change over 40 seconds – no beachgoer wants clouds blocking out their sun!
By the time I wrapped that afternoon, I had completed nine batches of frames and a handful of ‘right light’ frames. Despite the challenge of moving clouds and shifting light patterns, this panorama was easier to shoot. The quality of light was fairly consistent, so I didn’t need to work quite as fast to catch last light as I was the night before. But editing this panorama proved to be much more challenging than the skyline view.
For one, I had many more frames to edit down and experiment with. Second, some batches had more pleasing shadows than others, but no single batch had the ideal mix of clouds and sun. I spent hours of processing time trying to stitch various batches together, but none were jumping out at me as ‘the one’. To complicate things, the shifted shadows between adjacent frames made it impossible for Photoshop to correctly align the panorama. In most of the tests, only 70% of the panorama would be rendered out correctly – some frames were being discarded from the composite. Not good. It was clear I’d have to manually position and blend a large percentage of the photos to create the final panorama – a job I reserved for the next day.
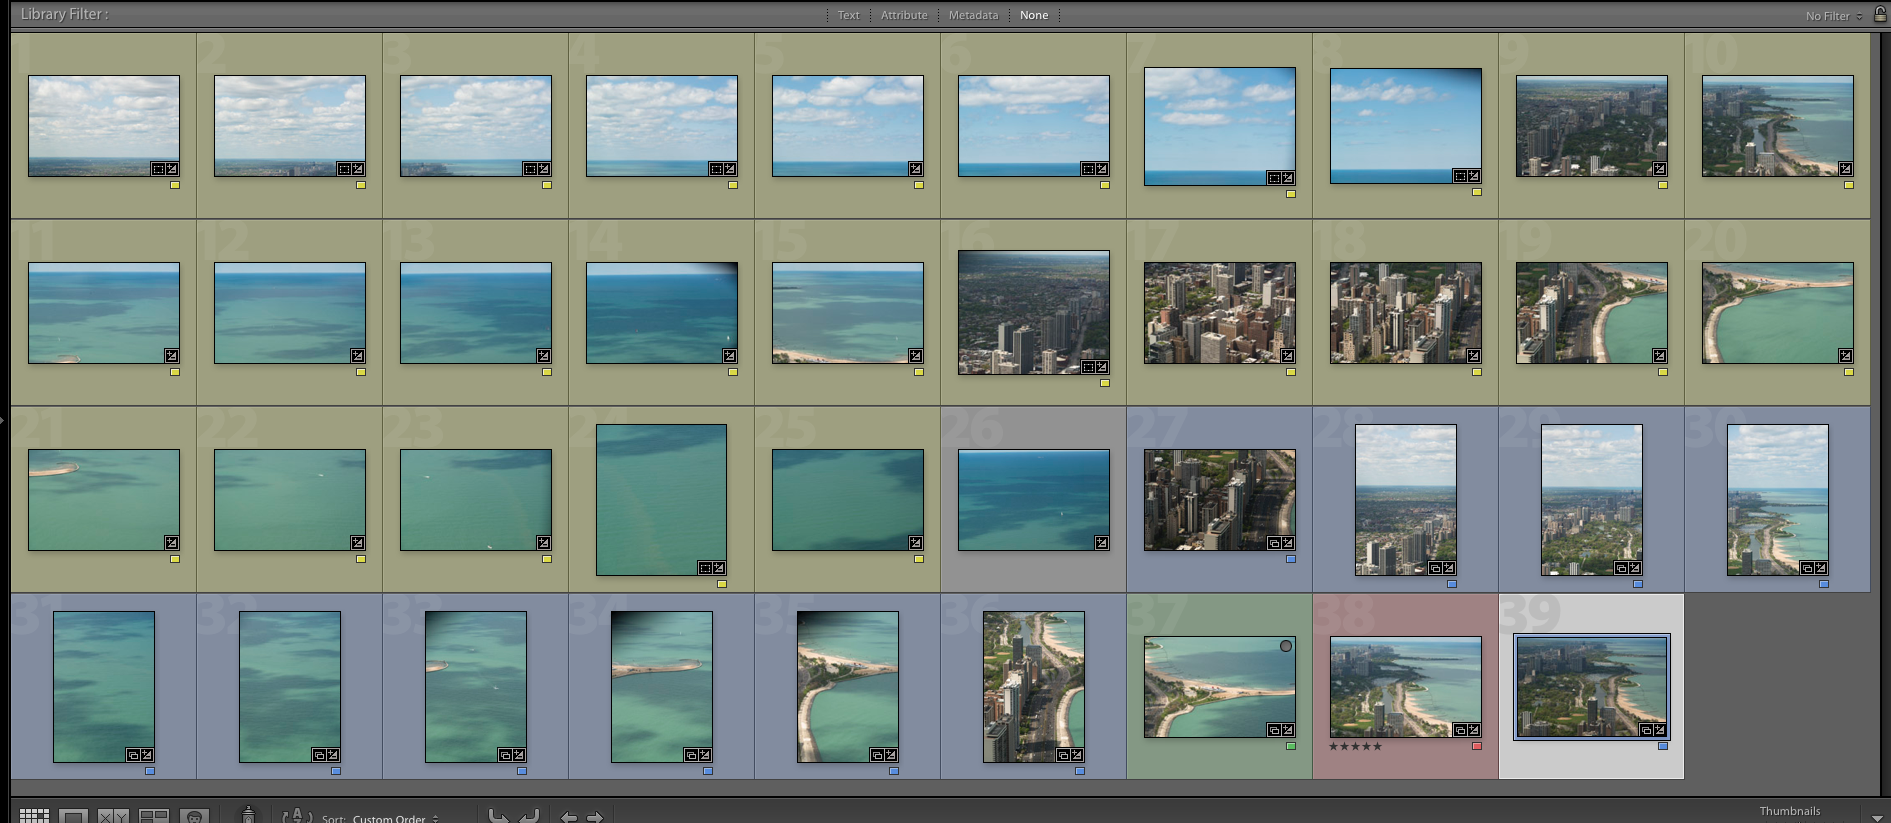
Once I had the best batch picked out, I had Photoshop stitch what it could. When that was complete I began tediously fusing the most favorable frames from different batches to create the final piece. All told, I used portions of 39 separate images (below) to create the final 40,282 pixel panorama.
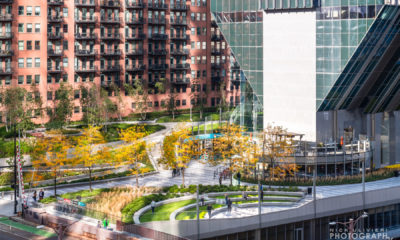
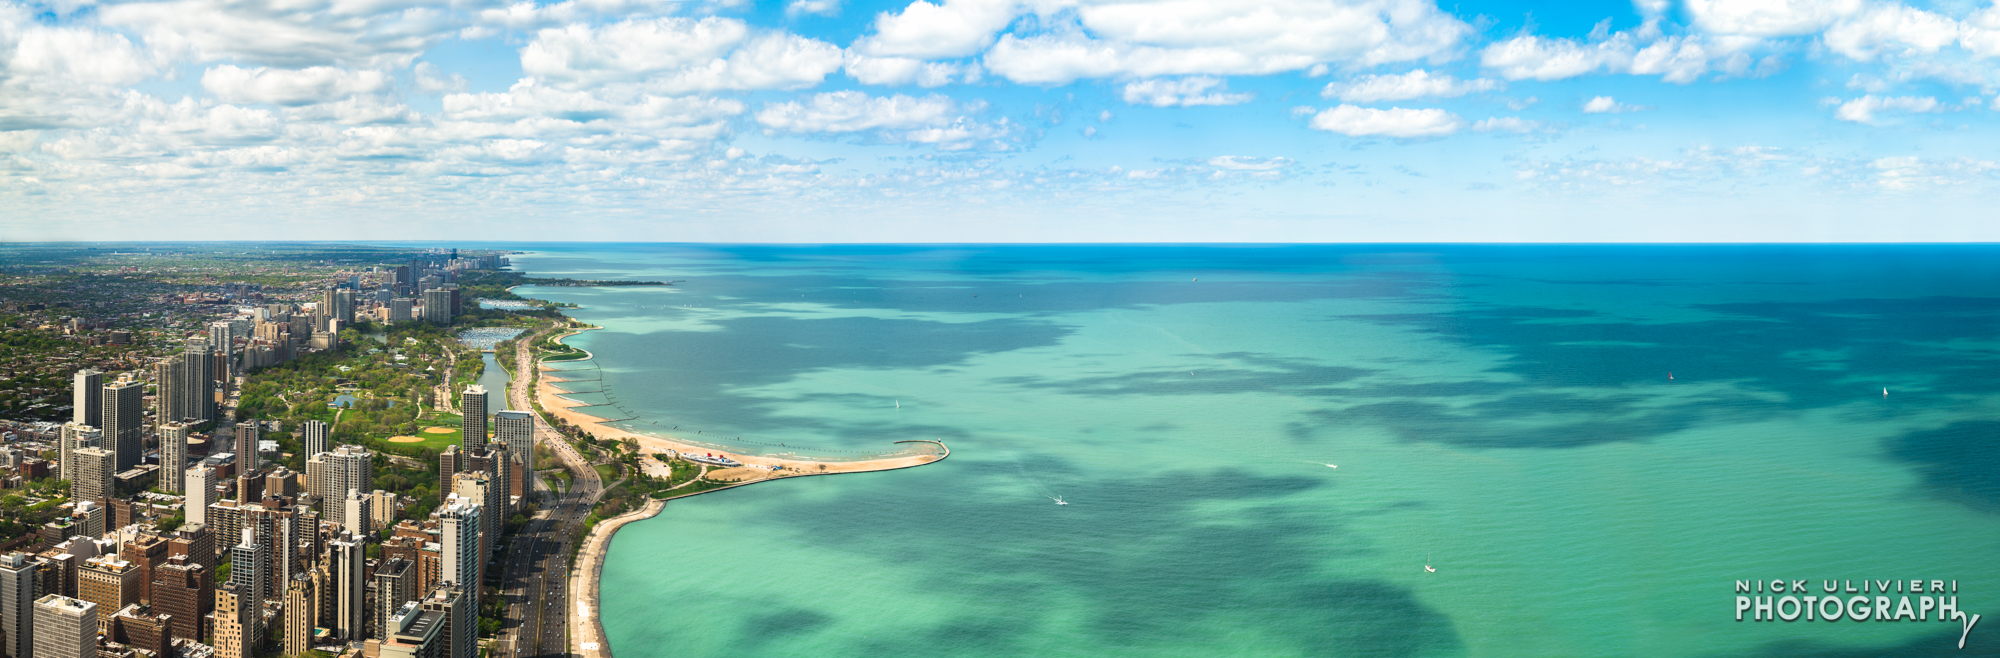
What started as an editing experiment around 4:00pm turned into a marathon editing session ending a little after 2:00am. Here’s the final piece:
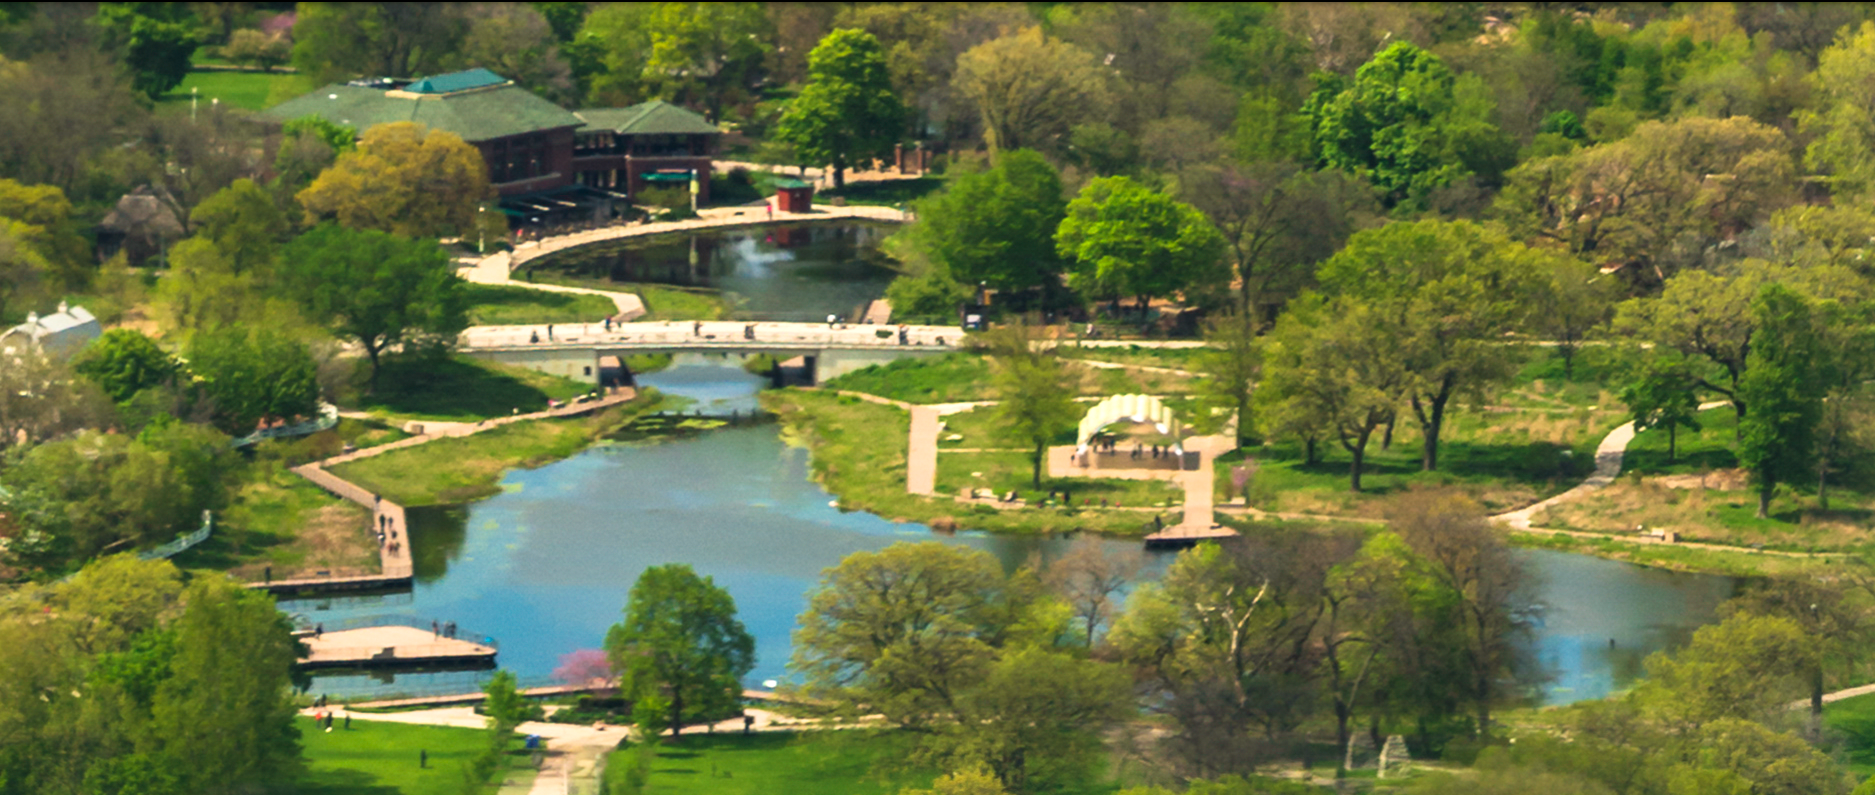
For scale, here’s Lincoln Park’s South Pond at 1:1 scale. Unfortunately the thick glass of the observatory does degrade the image’s sharpness a bit, but this still gives you a good idea of the type of detail in the full-sized image.
The final Pieces
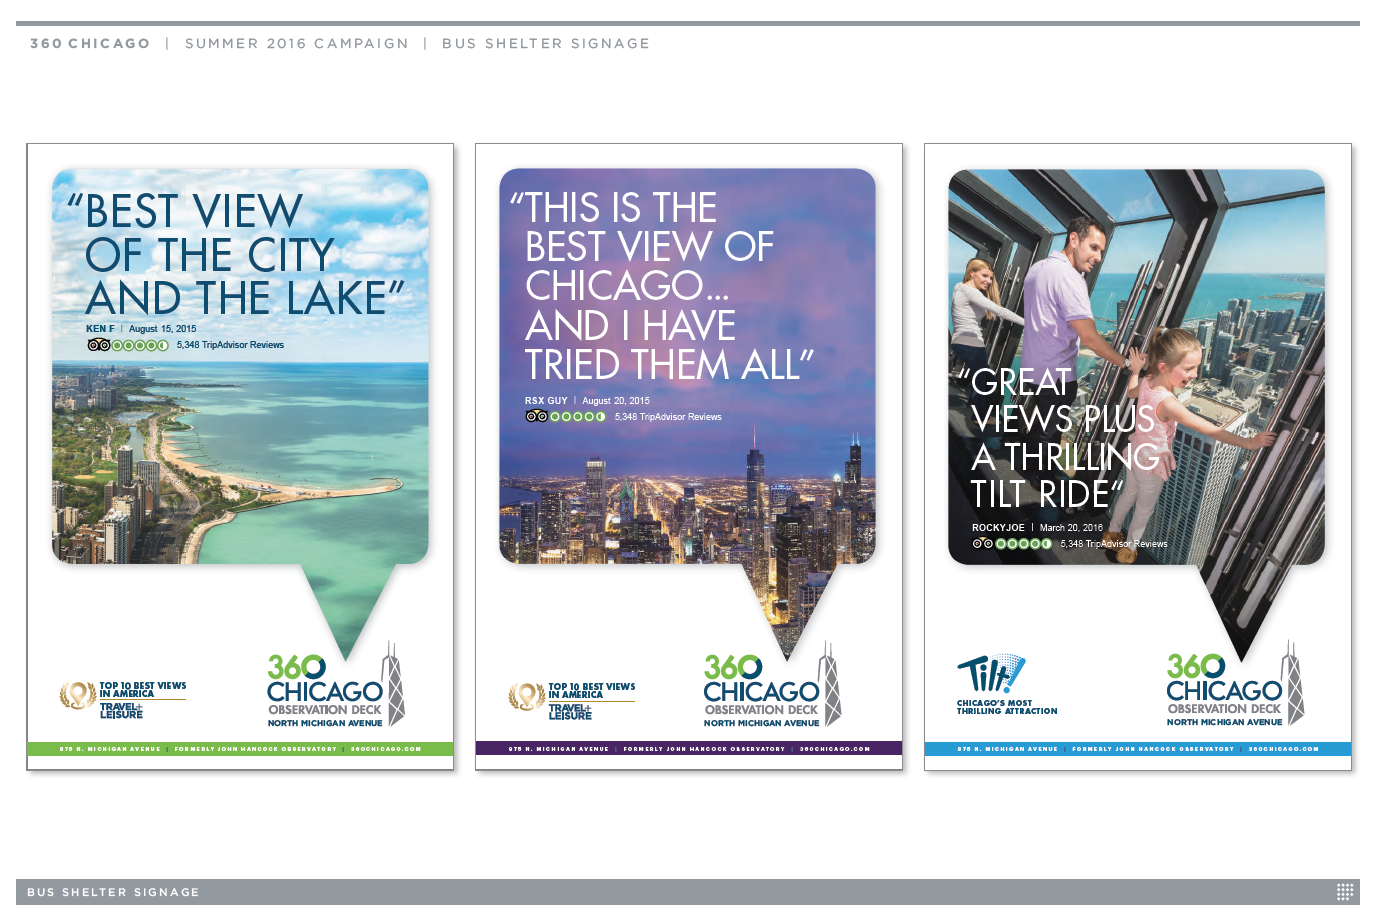
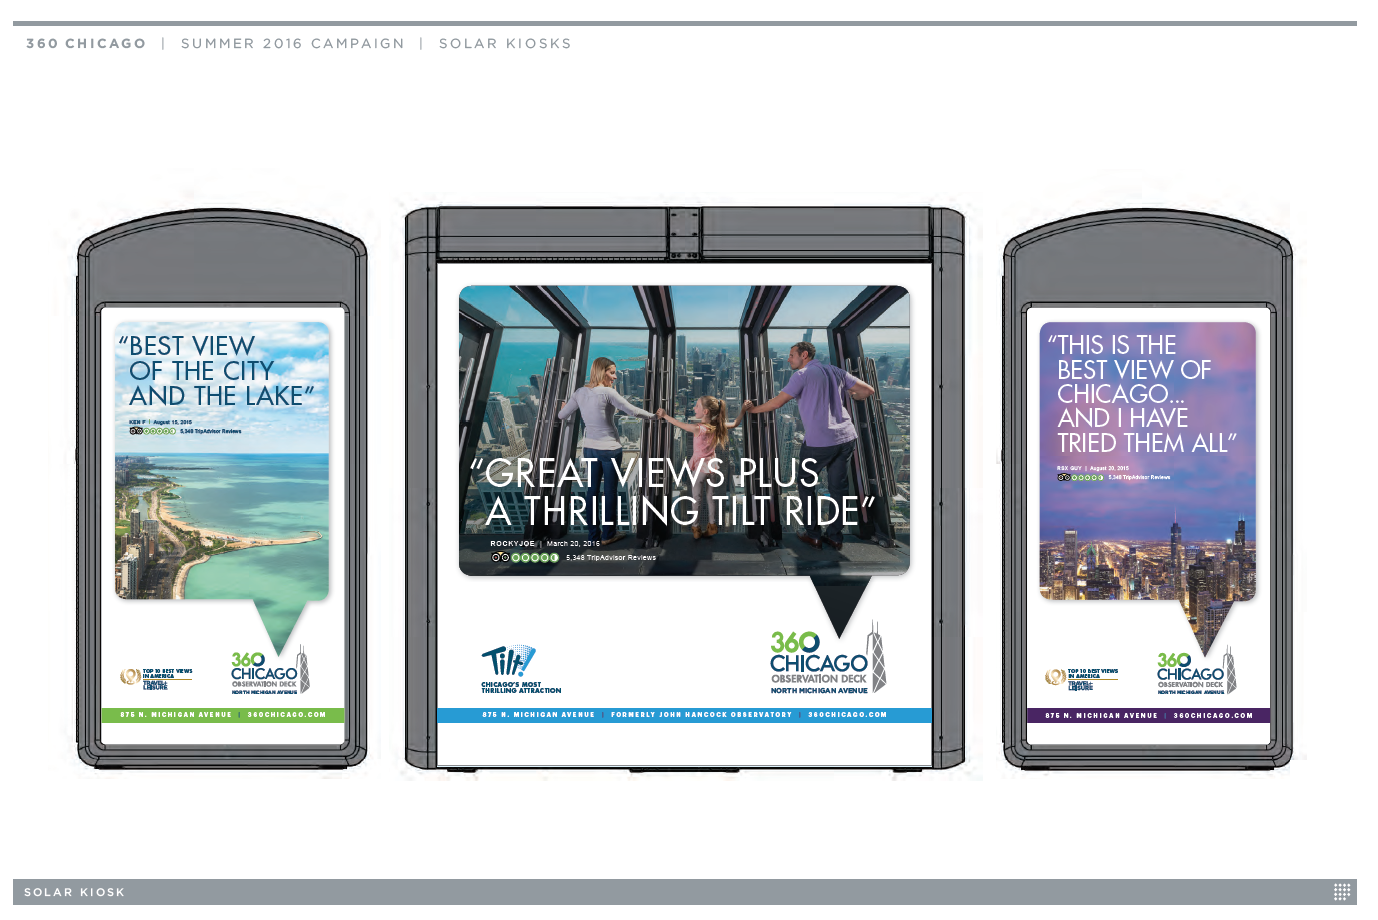
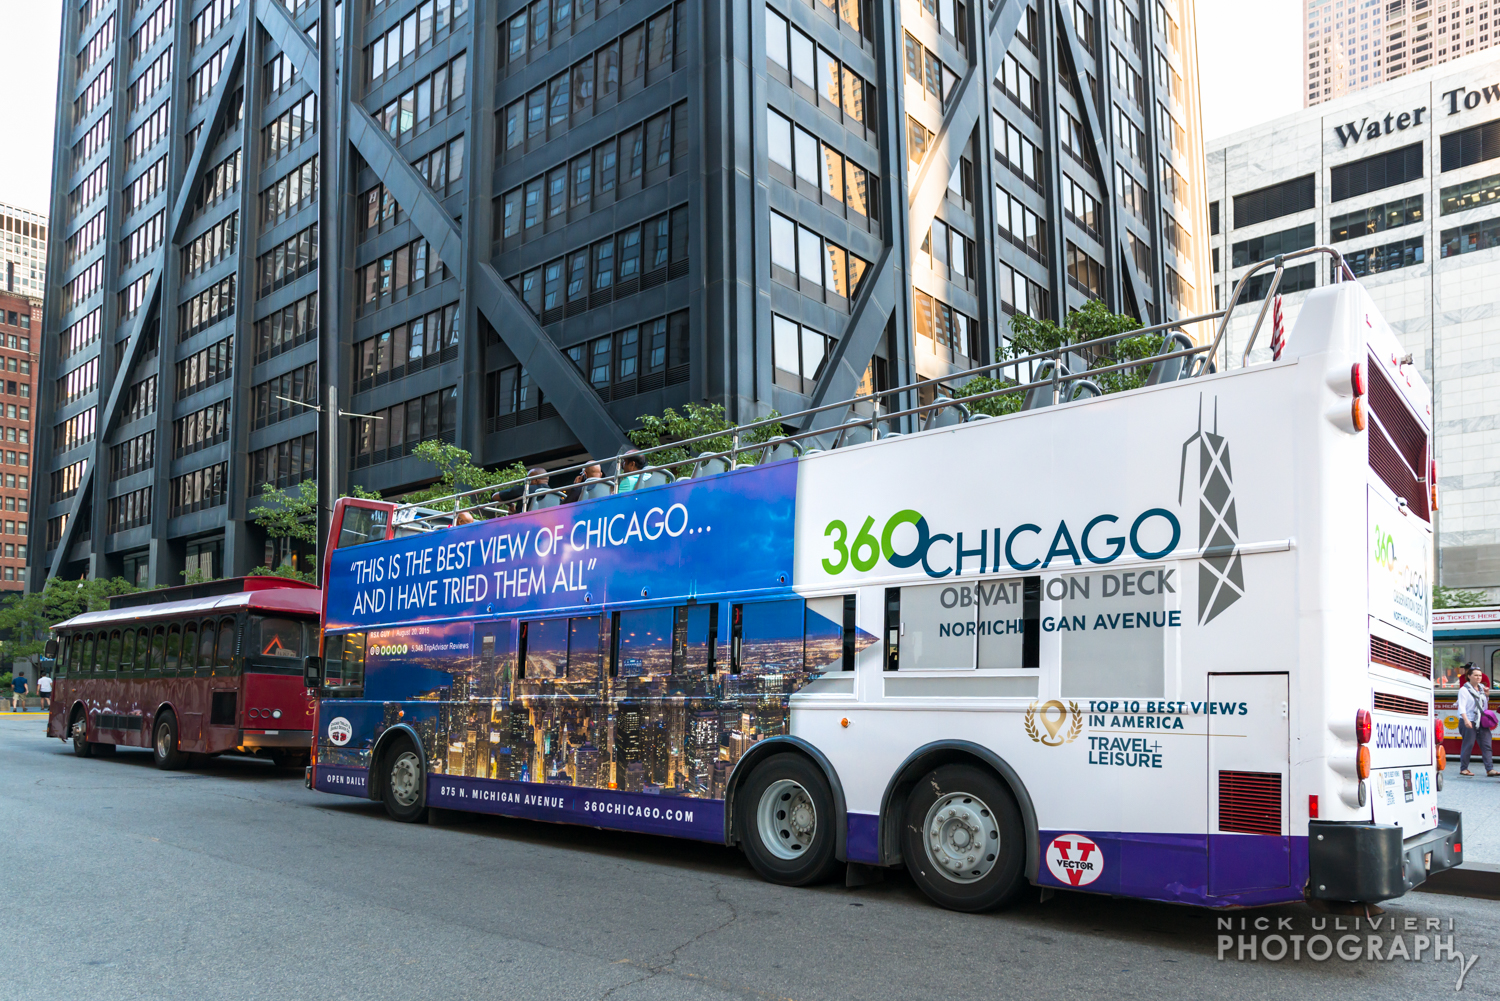
Fortunately, I was able to complete the panoramas and execute an additional TILT experience photoshoot before the deadline. If you’re out and about in the city, be on the lookout for my work on the Chicago Trolley Double Decker Co. busses, solar kiosks, and CTA bus shelters. If you see one, I’d really appreciate if you snap a shot and share it with me! Here are a few of the final renderings.