Photo Tutorial & Gallery | The Milky Way
Nick Ulivieri | August 10, 2011 (updated 6.8.12)Intro
I’ll preface this post by saying that the key to taking good photographs is to know your subject. Photographing the Milky Way is no different. I’ve always been fascinated by science and astronomy, so when I learned I might finally see the Milky Way for the first time, I made it a point to re-learn what I thought I knew, and learn the things I didn’t know.
Before I get into how to actually take the picture, I’ve included some basic information on what the Milky Way is and how and when to see it in the night’s sky. Of course, I recommend researching it even further on your own. The Milky Way is an amazing sight to see in person, but when you know the true extent of what you are looking at, it’s even more spectacular.
What is the Milky Way?
To put it simply, a galaxy is a massive, gravitationally bound group of stars, dust, and gases, and other stellar remnants. The Milky Way happens to be our home galaxy. Our galactic neighborhood is about 2/3 out from the galactic center of the Milky Way within the Orion–Cygnus Arm; one of many arms that gives our galaxy its spiraled shape.
The Milky Way is impressively large, spanning some 100,000 light years across. That’s a mind-blowingly long distance! To put this in perspective, light travels 5,865,696,000,000 miles in ONE year. That’s 5.9 trillion miles. Multiply that by 100,000 and you come up with a number too big for any calculator I know of to display in full on the screen. But not too big for Google! The Milky Way is 587,849,981,000,000,000 miles wide. Huge.
At current estimates, our Milky Way contains between 200 and 400 billion stars…depending on which astronomer you ask. A tiny fraction of which are visible to the naked eye, even on the most clear, light pollution-less nights. It’s is extremely old, too. Current estimates peg our galactic home at nearly 13.2 billion years old.
By the way, scientists think there may be up to 170 billion galaxies in the observable universe. And while we sit here on this tiny pale blue dot called Earth, the universe is constantly expanding around us, growing larger and larger. Crazy, isn’t it?
Where and when can I see the Milky Way?
Technically, you can always see the Milky Way since we live in it, but when I refer to the Milky Way in terms of photographing it, I’m describing photographing the galactic plane; the white, milky band that streaks across the southern sky. As I said earlier, the Milky Way itself is a disc-shaped spiral, and given our position in the galaxy, our view of the galactic plane is head on. Just as if you were looking at the edge of a frisbee. What you are actually seeing in this white, milky band, are all of the densely packed stars, gas, nebulae, and dust that form this disc we call the Milky Way
Ok, so now that we know what it is, how can we best see it?
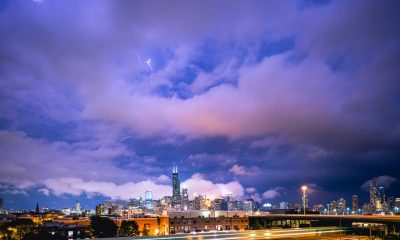
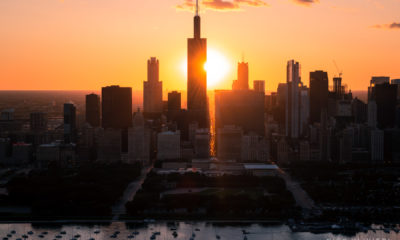
1. Find a dark place: The first, and most obvious answer is that you must be in a very dark place. As the human race continues to spread across the Earth, the amount of light-pollution at night grows. In every urban and metropolitan area the stray lights of our cities propagating through our atmosphere can easily drown out even the most prominent features of the Milky Way. To get an idea of the light pollution where you live, and more importantly, where you can find dark skies, head on over to this light pollution map (Green is good, blue is better, nothing is best).
The Moon also plays a huge factor. No matter where you are, or how dark that location usually is, a bright moon reflects enough sun light to put a damper on your dark sky experience. Here’s a handy link to find the moon phases on any particular day. The new moon (moon is never is visible day or night) is the preferred time to view the Milky Way. That said, you can still get a good view of the Milky Way for all but a handful of days each month before and after the full moon. Depending on when it rises and sets, of course.
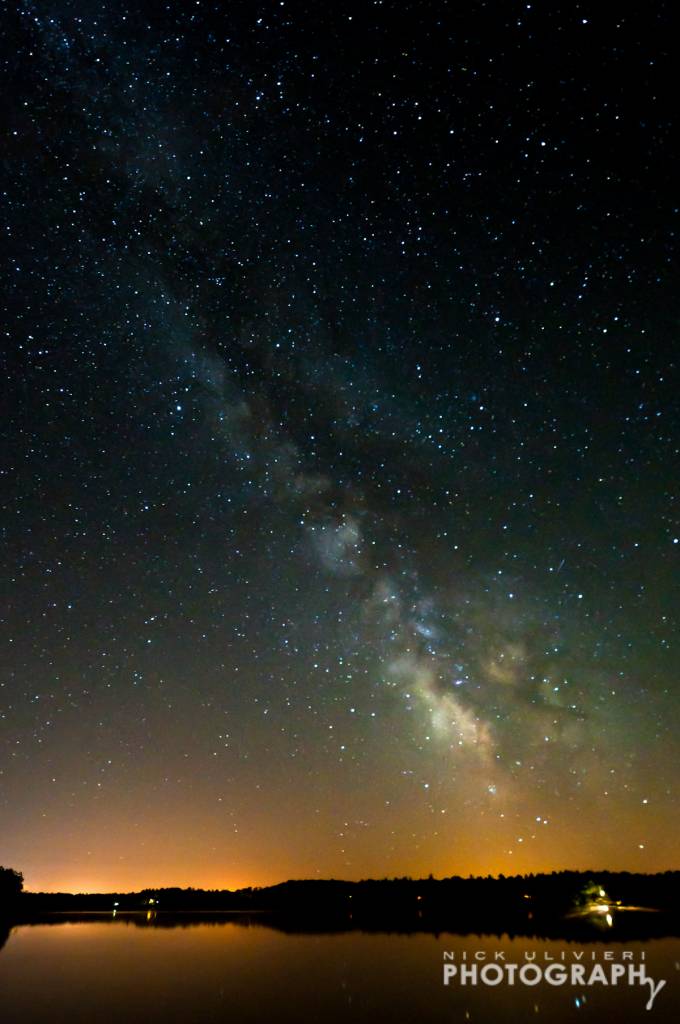
2. Time of year matters: For all intents and purposes we assume the stars are in a fixed position in the sky. The Earth however, is not. Our planet spins on its axis, at the same time it orbits the sun. Because of this, the star field looks vastly different in the summer than it does in the winter. That said, the Milky Way is visible during all parts of the year, but the most prominent features of the galactic plane, specifically the galactic core (pictured just above the horizon in my photo), are best viewed in the Northern hemisphere during the summer months of May through September.
I highly recommend the “Planets” app if you’re an iPhone, or iPad user for determining the Milky Way’s position in the sky relative to the time of year. First of all, it’s free. Secondly, you can input your location, adjust the time of year, and time of day to see when and where the Milky Way is visible in great detail. It’s a great app that will help you pinpoint the best time of year for where you live to view the most prominent parts of the galactic plane. It’s very helpful out in the field as well.
3. Check the forecast: Weather can also be a limiting factor in viewing the Milky Way. Obviously clouds and storms can completely block the night sky. High humidity & haze during the summer months can also hamper your view of the galactic plane. The end of August and beginning of September is a great time weather-wise because the humidity will start to drop during the night hours. But by that time of the year the galactic core will start dropping closer to the horizon, and ultimately under it, as winter approaches.
Tell me how I can photograph it already!!
Ok, ok, you know what it is, and where and when you can see it, so now we’re on to the good stuff! The goal of this tutorial is to teach you how to photograph the Milky Way in all it’s glory while making sure the visible stars exhibit little, if any star trails without the use of a motorized mount.
The Gear:
1. DSLR Camera with wide-angle lens
2. Sturdy tripod – a must
3. Remote shutter release – preferable but not necessary
About the photo: I snapped this photo on July 24 at approximately 11:07pm while up in the Northwoods of Wisconsin. Minocqua to be exact. Facing due South. According to the moon phase chart for that date, the moon was currently in the last quarter, or a waning crescent. At the time I snapped this photo the moon had not yet risen but was still a few degrees below the Eastern horizon (left side of photo). I am near certain that the light dome in this area of the photograph is from the moonlight refracting within the atmosphere. The light dome directly below the Milky Way is most likely from the city of Rhinelander. The bulbous portion of the Milky Way in this photo is the galactic core as noted by it’s proximity to the constellation of Sagittarius (Thanks Planets app!). The Great Rift, is also visible above the galactic core.
My settings: Manual mode shot in RAW. 32 second exposure @ f/3.5, Focal length of 10mm, ISO 2000, manually focused to infinity
Detailed settings explanation: Astrophotography, especially without the aid of a motorized equatorial drive, pushes the limits of what a DSLR can do. So I’ve gone over the finer points of the why’s and how’s of the settings to give you a better understanding of why I ended up at the above settings.
1. Shutter Speed: It would be great if we could leave our shutter open for 2-3 minutes, but unfortunately the Earth is spinning. A shutter speed of 2 minutes would all but guarantee the stars to be visible trails. Since the goal of this tutorial is to freeze the stars we need to speed up our shutter. There is a formula for determining the appropriate shutter speed for any given focal length to ensure the stars exhibit no movement. The accepted formula is 600/focal length for a full-frame sensor. So if you’re shooting with a focal length of 12mm you should be able to get away with a 50 second shutter speed (600/12 = 50). I however, was shooting on a crop sensor. After experimented with multiple shutter speeds, I found that even at a focal length of 10mm, 32-35 seconds was about the maximum shutter speed I could shoot to ensure no star trails. So, for a crop sensor, I recommend starting with formula 300/focal length and experimenting with slightly faster shutter speeds until you find what works best.
Of course, you could experiment with slightly longer exposures to see how far you can push it. With that said, you will more than likely need to shoot in “bulb” mode if you’re experimenting with speeds higher than 30 seconds. For this you will want to use a remote shutter release. It makes things much easier, and ensures you don’t touch the camera. In fact, I recommend using the remote even if you’re not shooting in bulb mode to ensure you don’t transfer any movement to your camera. If you don’t have a remote, set a timer. This will make sure any vibrations you do transfer to the camera/tripod cease before the shutter opens.
2. Aperture: The sky is dark, the ground is dark, everything is dark. And since we have a finite period of time the shutter can be open you want to shoot with your aperture as wide open as possible. In the case of the wide-angle lens I was using, f/3.5 was as wide open as I could go. Next time, I’ll either use my mid-range f/2.8 or rent a wide-angle with a larger maximum aperture. As I said earlier, we’re pushing the limits of a DSLR so in order to achieve a good photo of the star field, you will have to fore go the sharpness that you may be used to at smaller apertures.
3. Focal length: The focal length you choose is up to you. It’s really a matter of composition. That said, remember that the shorter your focal length, the longer your maximum shutter speed can be, thus ensuring a more exposed, and prominent, Milky Way.
4. ISO: For all of you that are afraid of using high ISO’s because of the noise, you’re going to have to go well outside of your comfort zone if you want to capture the Milky Way in any detail. We’re limited on shutter speed, and limited on the maximum aperture. The only other option is to bump up the ISO. I found that on my camera ISO 2000, gave me a good balance of exposure while limiting the amount of noise in the shot. Though you should also try higher ISO’s to see what works best for your camera.
5. Focus: Manually set your focus to infinity. At the light levels you will be working in, auto-focus will be all but useless.
6. RAW: Make sure you’re shooting in RAW. If you plan to do any post-processing, which I can almost guarantee you will, you’re going to want the highest quality file to work on.
More tips and tricks: You’ve made it this far, why not learn a few more things?
1. Make sure you put your tripod on a sturdy surface, seems pretty simple but is very important. If your tripod is less than sturdy, you can hang a weight from it for added heft. Beware though, a light breeze can blow the weight and shake the tripod. It’s best to make sure the weight is on the ground and attached with a taught cord or rope.
2. Before you even take a “final” photo, do some test shots. Up your shutter speed to a minute, crank up your ISO way high, etc. The point here is to get an overexposed image on your LCD so you can determine the composition of your scene. It’s near impossible to see the finer details of your vista, or square up your horizon through the viewfinder when it is that dark. Use the over exposed image to help you set-up the best composition for your particular location.
3. Pixel peep. Once you’ve taken your test shots and have moved onto your final photos, make sure you carefully review each image and learn from it. Zoom way in, and check to see if you have star trails. What might look good on your camera’s LCD screen at full-size, might not look so good zoomed in, or worse, on your computer once you are done shooting. Are there star trails? Do they look oblong? Or are they fine points of light? Was there an airplane flying in the distance? Double and triple check your images before you finish shooting for the night.
4. Your LCD is bright, everything else is not. If you can turn the brightness of your LCD down do it. If you can flip it out of the way, do it. Especially if you are trying to use your viewfinder for compositional adjustments. Looking back and forth between the bright LCD screen and the dark landscape ahead will save your eyes a bit of time trying to adjust to the fluctuation light levels
5. Noise Reduction (update): I had originally suggested Turning off any in-camera ISO or Long Exposure noise reduction (LENR) functions on the camera, because I wanted the instant feedback, however, one of my readers left a great comment about why and when you should leave it on:
“When using noise reduction, an equivalent black frame is being shot. It’s a common misconception that noise reduction works like it does in Photoshop. Black frame noise reduction works by exposing an equivalent shot (using all the same exposure parameters) but with the shutter closed. Then, anything whatsoever that appears in the theoretically black print is noise. This is usually the result of heat in your CMOS or CCD. The camera then subtracts these signal values from your photo.This type of noise reduction is only possible in camera and is far superior to noise reduction using single image algorithms like those found in Photoshop. My advice is to leave the noise reduction on for shooting the Milky Way. If you’re stacking exposures (another form of noise reduction common in astrophotography) then you should leave off in camera noise reduction. Also, if you’re stacking images for longer trails, then also leave it off. But for the most part, leave it on. Your stars, even your faint ones, should be safe.Just my $.22 (adjusted for inflation)”
6. A note on post-processing: Unless you really pushed your ISO, you’ll probably notice you need to bring the photo into your favorite post-processing software to polish it up. A small bump in exposure was necessary in my photo. The higher ISO also lowered the overall contrast of the image. So I upped the contrast as well as manipulated the tone curve. I bumped up the highlights to make the bright stars pop and lightly brought down the darks and shadows to saturate the blacks. Small bumps in color saturation were also made to bring out some of the color present in the galactic plane. Lastly, I performed some digital noise reduction. Though I don’t push it too far. Too much noise reduction on a photo of stars does a funny thing – At high levels of reduction, some of the fainter stars disappear. I can only assume the software thinks these small stars themselves are noise.
7. Lastly, please make sure to spend spend some time enjoying the view with your own two eyes!
Have fun, happy shooting!
-Nick
Sources & more info:
A few more shots on my Flickr page